Sunday, December 19, 2021
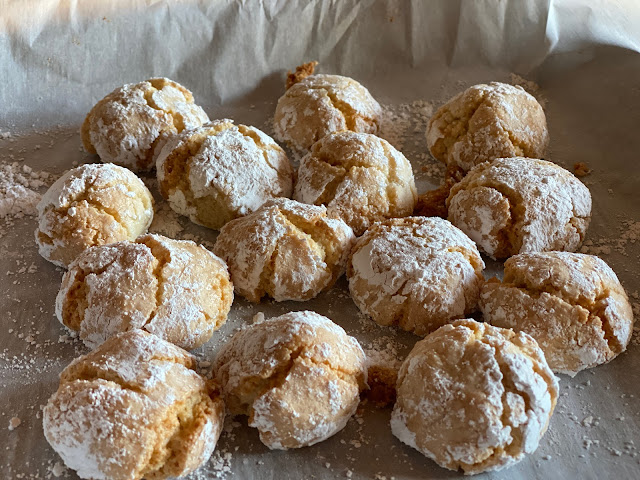
Amaretti
Amaretti
Wednesday, December 15, 2021
Tarta de col azul y queso de cabra.
Blue Cabbage and Goat Cheese quiche.
Sunday, December 12, 2021
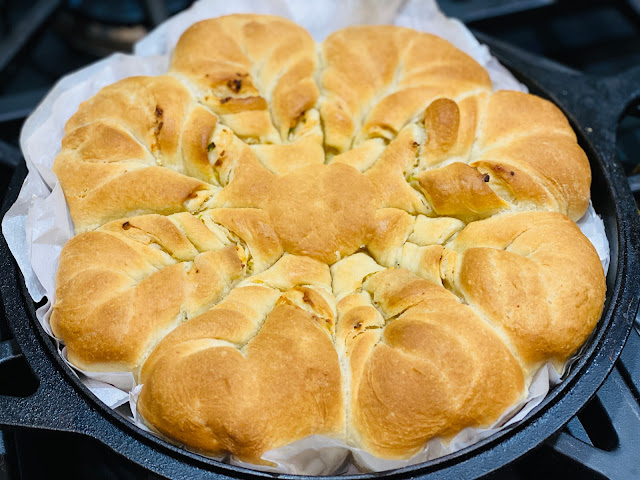
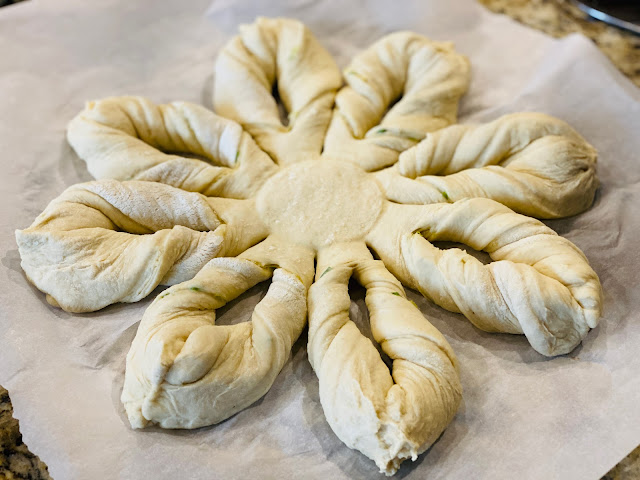
Pan Estrella con Ajo y con pesto
Me gusta ver canales de youtube relacionados con la comida y los viajes. Llegué este pan y lo hice casi de inmediato. La consistencia es muy suave y esponjosa. La receta original requiere una cabeza de ajo y pensé que sería demasiado. Sin embargo, ¡quedó perfecto! ..... hice un segundo relleno de pesto y queso .... ¡¡fue una muy buena idea !!
He adaptado la receta
Pan estrella
Masa:
1/2 cucharadita de levadura
2 cucharadas de masa madre 100% hidratación
200 gramos de agua
250 gramos de harina de pan
70 gramos de harina integral
1 cucharada de azucar
1/2 cucharadita de sal
24 gramos de aceite de oliva
Relleno 1:
una cabeza de ajo
1 cebolla verde
2 cucharadas de mantequilla
1/2 cucharadita de sal
Relleno 2:
pesto y queso
Pica el ajo y pica la cebolla verde. Saltee en mantequilla, pero no deje que se doren. Condimente con sal. Dejar de lado.
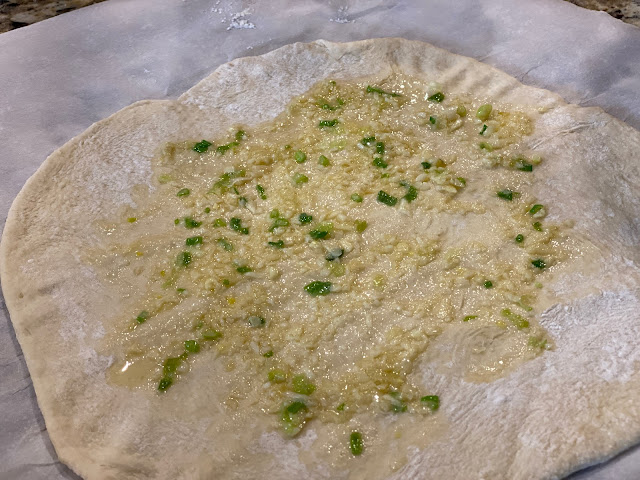
Masa: Mezclar todos los ingredientes y amasar durante 6 minutos. Déjelo reposar durante 2 horas. Dividir la masa en 4 piezas iguales. Con un uslero, hacer un círculo. Unte 1/3 del ajo salteado, coloque otro círculo de masa. Continúe hasta que tenga cuatro capas.
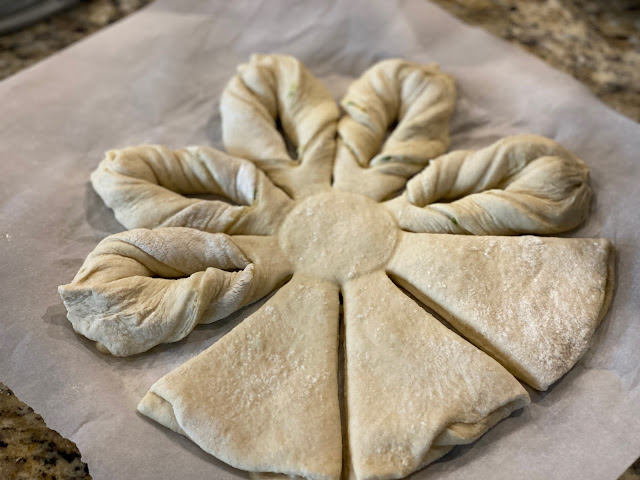
Con un vaso, haz una marca circular en el centro. Corta el pan en 8 secciones, evitando entrar en el círculo del medio. Corte cada una de las secciones en dos, gírelas y péguelas. Repite con las secciones restantes.
Colócalo en un molde para que se pueda usar en el horno. Cúbralo y déjelo reposar durante 45 minutos. untarlo con aceite de oliva y hornear a 205 ° C durante 30 minutos. ¡¡DISFRUTAR!!
Star bread with Garlic and Pesto
I like to watch youtube channels that are related to food and travel. I came along this bread, and I made it almost immediately. The consistency is very soft and spongy. The original recipe calls for a head of garlic, and I thought it will be too much. However, it ended up perfectly!.....I made a second one filled with pesto and cheese....it was a very good idea!!
The original video is this one
I have adapted the recipe
Star bread
Dough:
1/2 teaspoon of yeast
2 tablespoons of sourdough 100% hydration
200 grams of water
250 grams of bread flour
70 grams of whole wheat flour
1 tablespoon of sugar
1/2 teaspoon of salt
24 grams of olive oil
Filling 1:
a head of garlic
1 green onion
2 tablespoons of butter
1/2 teaspoon of salt
Filling 2:
pesto and cheese
Mince the garlic, and chopped the green onion. Sautee them in butter, but don't let them become brown. Season it with salt. Set aside.
Dough: Mix all the ingredients, and kneed it for 6 minutes. Let it rise for 2 hours. Divide the dough in 4 equal pieces. With a roll pin, roll it in circle. Spread 1/3 of the sautee garlic, place another dough circle. Continue until you have four layers.
With a glass, make a circle mark in the center. Cut the bread in 8 sections, avoiding entering the middle circle. Cut each of the section in two, twist them, and stick it together. Repeat with the remaining sections.
Place it on a mold that it can be used in the oven. Cover it, and let it rise for 45 minutes. brush it with olive oil, and bake it at 205C for 30 minutes. ENJOY!!
Wednesday, December 8, 2021
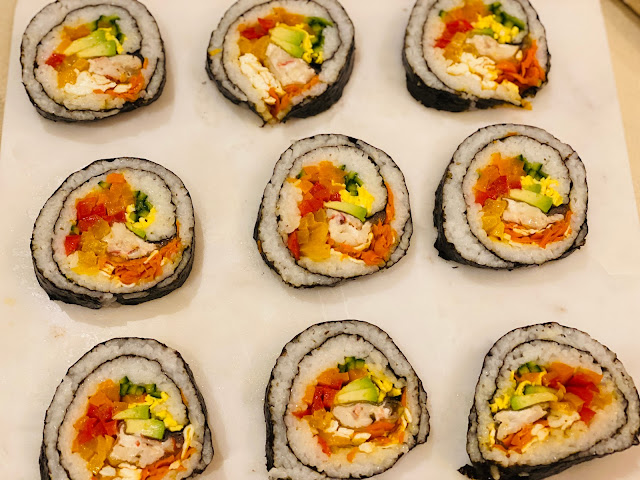
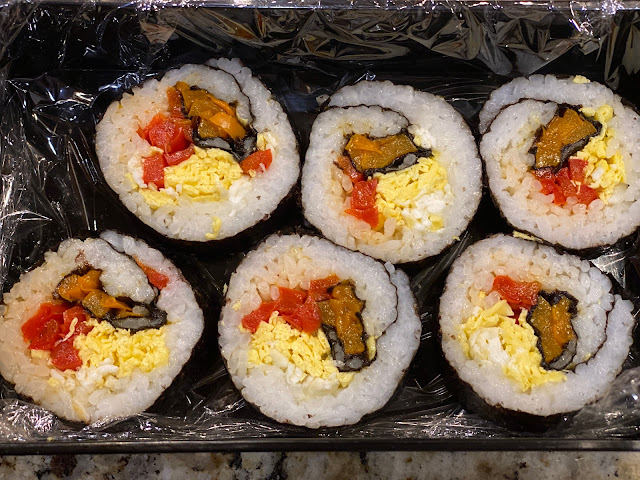
Kimbap o Gimbap....Sushi Coreano
Me encanta la comida coreana ... kimchi, panqueques de kimchi, gimbap y arroz frito con kimchi son solo algunos de los platos que hago ... no son difíciles de hacer ...
Mi amiga me enseñó a hacer Kimbap. Kimbap es la versión coreana del sushi. Sin embargo, al ver algunos videos en youtube sobre cómo hacer kimbap coloridos, me enamoré de la presentacion y de lo fácil que es hacerlos.
Es difícil explicar cómo hacerlos; así, te invitaré a que veas algunos videos de youtube como este
Sin embargo, daré algunos consejos sobre cómo hacerlos.
Arroz hervido y tibio. Puedes condimentarlo con un poco de sal, azúcar y vinagre de arroz. No lo sazono.
Verduras de diferentes colores:
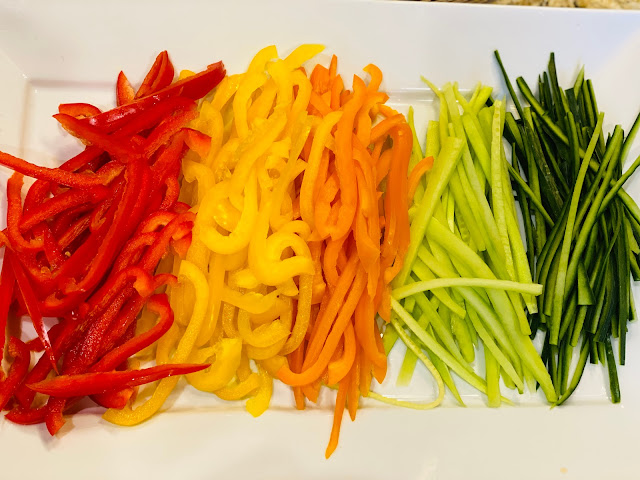
Usé pimiento rojo, pimiento amarillo, pimiento naranja, zanahorias y repollo azul. Todos ellos fueron cortados en rodajas finas y salteados (no demasiado cocidos).
Aguacates, pepino. Todos ellos finamente cortados.
Huevos. Separe las claras y las yemas de huevo. Haga panqueques finos para cada masa y córtelos finamente.
Para las proteínas, usé atún con mayonesa, salmón ahumado y camarones con mayonesa.
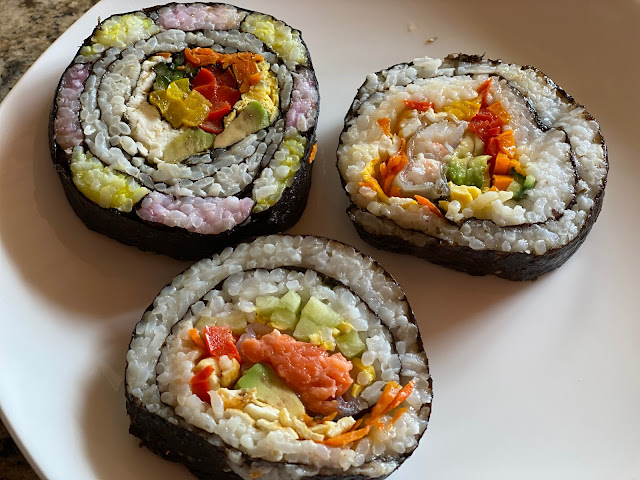
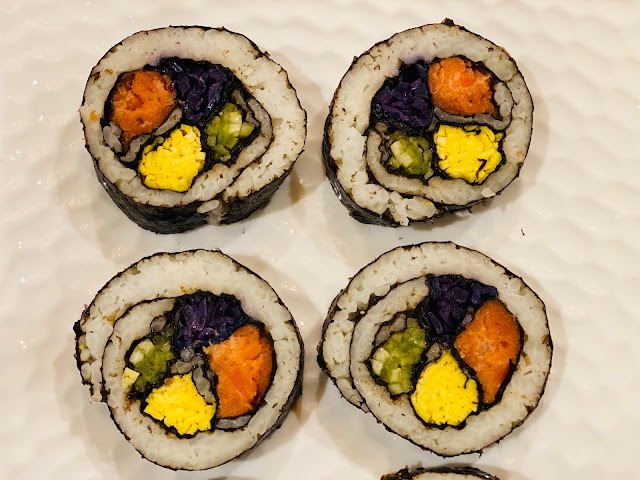
El truco para hacer los círculos dentro del kimbap, es usar 1/2 hoja de algas. Primero, haces pequeños rollos de verduras, arroz o arroz coloreado. Luego, los colocas dentro del rollo para hacer las figuras.
Tienes que utilizar 1 hoja y 1/2 de algas. Puedes pegar ambos con arroz. Unte el arroz y luego coloque diferentes combinaciones de verduras y proteínas. Enróllelos y cúbralos con papel film. Ponlo en el frigorífico hasta que lo sirvas. sírvela con salsa de soja y kimchi. ¡¡DISFRUTAR!!
Kimbap or Gimbap.....Korean Sushi
I love Korean Food......kimchi, kimchi pancakes, gimbap, and kimchi fried rice are only some of the dishes I make...they are not difficult to make.....
My friend taught me how to make Kimbap. Kimbap is the Korean version of sushi. However, watching some videos in youtube on how to make colorful kimbap, I fall in love with the colorful display, and how easy they are to make them.
It is difficult to explain how to make them; thus, I will invite you to watch some youtube videos like this one
However, I will give some tips on how to make them.
Rice boiled and warm. You can season it with some salt, sugar and rice vinegar. I don't season it.
Veggies of different colors:
I used red bell pepper, yellow bell pepper, orange bell pepper, carrots, and blue cabbage. All of them were sliced finely and stir fry (not overcooked).
Avocados, cucumber. All of them finely sliced.
Eggs. Separate egg whites and egg yolks. Make thin pancakes for each batter, and slice them finely.
For protein, I used tuna with mayonnaise, smoked salmon, and shrimps with mayonnaise.
The trick for make the circles inside the kimbap, is to use 1/2 of seaweed sheet. First, you make small rolls of veggies, rice, or colored rice. Then, you place them inside the roll to make the figures.
You have to use 1 and 1/2 seaweed sheet. You can glue both with rice. Spread the rice, and then place different combination of veggies and proteins. Roll them, and cover them with plastic wrap. Place it in the fridge until you serve it. serve it with soya sauce and kimchi. ENJOY!!
